
D5 Render 3.0 is not interesting simply because it has more AI buttons. Its bigger promise is continuity: moving from an early model to a believable image without exporting the scene into a disconnected sequence of generators, asset tools, and post-production applications.

What changed with D5 Render 3.0
D5 presents version 3.0 as the intelligent core of a connected workflow spanning D5 Lite, D5 Works, and D5 Render. The release includes more than 15 AI-assisted features, with headline tools such as AI Image to 3D and AI Scene Match alongside AI PBR Material Snap, AI Asset Recommendation, and AI Enhancer.
The important distinction is where those tools operate. A standalone image generator can suggest a compelling atmosphere, but it does not know which wall, camera, material, or asset must survive the next design revision. D5’s embedded approach aims to keep more of that intelligence inside the live scene.
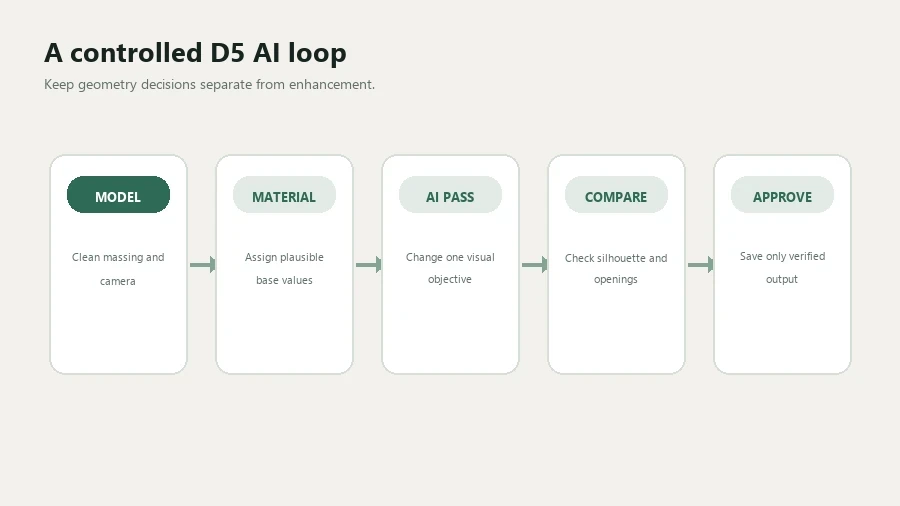
A five-stage workflow for architects
Stage 1: prepare the model for synchronization
Before adding assets or prompts, clean the source model. Use consistent material names, remove duplicate faces, simplify objects that will never be seen, and separate elements likely to change. Live synchronization is only fast when the underlying model is legible.
Create saved cameras in the modeling application and D5. Name them by purpose—arrival, lobby, courtyard, facade study—rather than “View 01.” This makes later design comparisons much easier.
Stage 2: establish a neutral visual baseline
Do not begin with enhancement. First create a plain, credible version of the scene using a neutral sky, correct exposure, basic materials, and a limited asset set. This becomes the control image against which every AI-assisted change is judged.
- Confirm camera and verticals.
- Check facade openings and floor levels.
- Set sun direction to explain the form.
- Verify the scale of people, trees, and furniture.
Stage 3: use AI to reduce setup time
AI PBR Material Snap is useful when a reference or surface sample needs to become a workable physically based material. Treat the output as a starting point: inspect scale, normal strength, roughness, and repetition under the project lighting.
AI Asset Recommendation can shorten library searches. Accept recommendations by role and scale, not simply visual similarity. A tree that looks right in a thumbnail may have the wrong canopy, climate, or mature size for the project.
AI Image to 3D can help with secondary props and rapid prototyping. Keep generated geometry away from contract-critical components unless it has been rebuilt or verified. Check silhouette, topology, UVs, materials, and polygon cost before duplicating an object across a large scene.
Stage 4: use Scene Match as direction, not truth
AI Scene Match can translate the lighting, atmosphere, or visual logic of a reference into the D5 scene. Choose references that communicate one clear target. A crowded mood board containing different seasons, lenses, and material palettes gives the system—and the design team—conflicting instructions.
Reference brief:
Purpose: soft overcast hospitality exterior
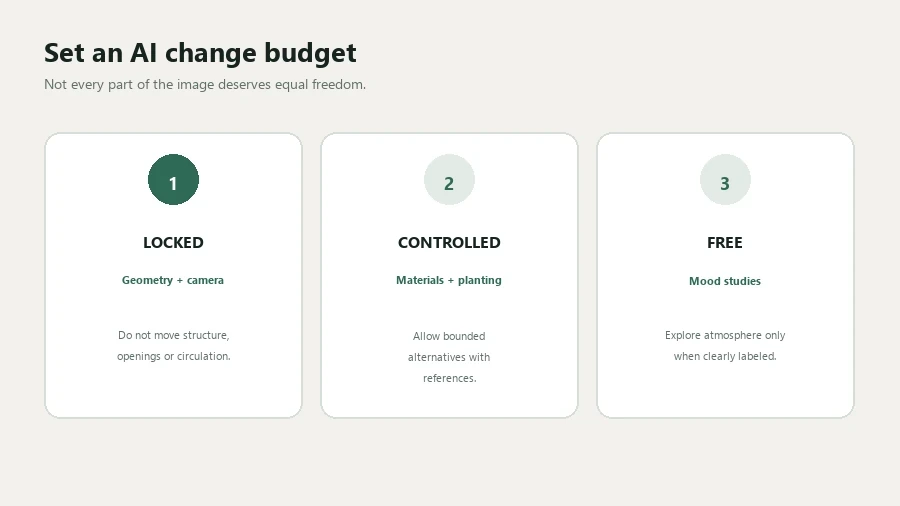
Keep: camera, massing, openings, landscape zones
Explore: sky softness, material warmth, planting density
Reject: new facade elements, changed floor count, dramatic color grading
After matching, compare the scene with the neutral baseline. If the atmosphere works but the architecture reads less clearly, keep the lighting idea and reduce the stylistic influence.
Stage 5: enhance only after approval
AI Enhancer belongs near the end. Use it after the camera, geometry, landscape, material direction, and lighting are approved. Enhancement can improve local realism, but it should not become a repeated rescue operation for unresolved materials or poor composition.
The 15-minute render claim: a better way to use it
D5 has published a full AI-assisted architectural rendering workflow framed around producing a result in approximately 15 minutes. That is a useful exercise for learning tool order and identifying bottlenecks. It is not a realistic production promise for every project.
Run your own timed test with a small, representative scene. Record minutes spent on import, materials, environment, assets, lighting, and enhancement. The outcome is not simply a fast image; it is a map of where your studio loses time.
Geometry-control checkpoints
- The synchronized model remains the source of truth.
- Every AI-generated object is reviewed for scale and polygon cost.
- Scene Match changes atmosphere, not approved architecture.
- PBR materials are checked at close, typical, and distant views.
- Enhancement is applied to an approved image, not an unresolved design.
- AI-assisted concept outputs are labelled when shared externally.
Where D5 3.0 can save the most time
The biggest gains are usually not in the final render calculation. They come from fewer searches, fewer external material-building steps, faster environmental setup, and less rebuilding after a design revision. D5’s published workflow material emphasizes the same shift: visualization is moving from a final deliverable to an active layer of design development.
That makes iteration velocity a better metric than render time. Track how quickly the team can update three approved cameras after a facade change, not only how many seconds one image takes to export.
Final recommendation
D5 Render 3.0 is most convincing when AI reduces friction around a persistent 3D scene. Use generative tools for alternatives, material starts, asset discovery, and controlled refinement. Keep cameras, geometry, scale, and design approval anchored to the model. The goal is not to automate taste; it is to spend less time translating information between tools and more time making visual decisions.
Sources and further reading
Continue Exploring