A convincing Lumion night render is not made by turning every light up. It comes from a controlled hierarchy: readable sky, believable interior spill, focused architectural light, safe circulation, and only then landscape accents. This tutorial builds that hierarchy from an imported model to a ray-traced final image.
What you need before starting
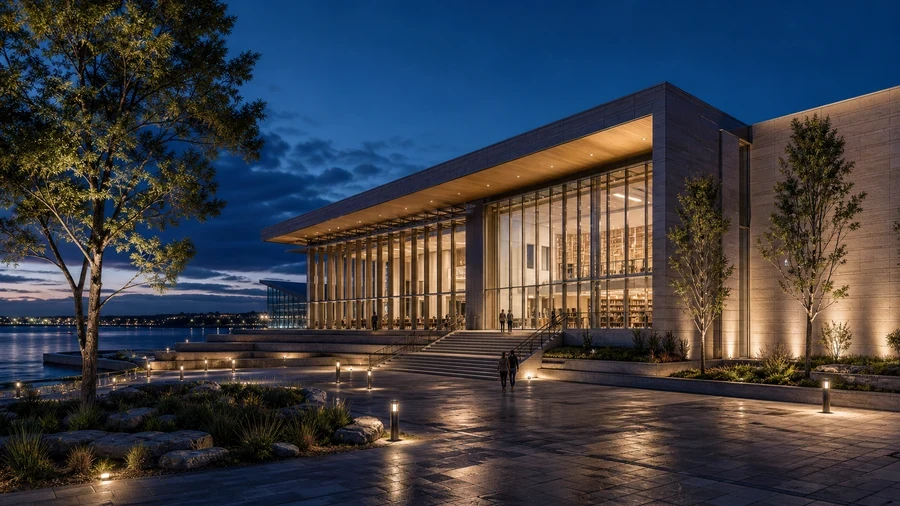
Use an imported model with correctly scaled geometry, assigned materials, modeled glass, and visible luminaires or proxy objects where lights should exist. The example is a waterfront civic library, but the method works for offices, schools, cultural buildings, hospitality projects, and public landscapes.
- Software: Lumion Pro 2026.1.2. Earlier versions may show different controls or lighting behavior.
- Input: one clean model, finished material assignments, and a defined exterior camera.
- Lighting information: fixture locations, intended color temperatures, IES files when the manufacturer supplies them, and any real lighting schedule.
- Output: a 16:9 still image. Start at 1920 × 1080 for tests; increase resolution only after the lighting is stable.
Duplicate the Lumion project before making a major lighting pass. Projects saved in Lumion 2026.1 cannot be opened in an older Lumion version.
Build the render in five lighting layers
Do not place every lamp in one session. Separate the work into five functional layers and render the same camera after each layer. This makes it obvious which group improves the image and which group creates glare, noise, or visual clutter.
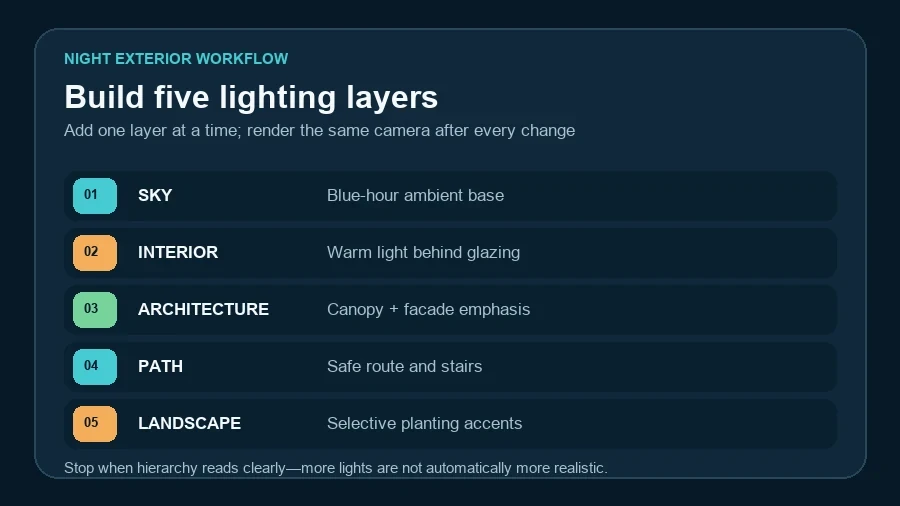
- Sky: establish blue-hour ambient light and the silhouette.
- Interior: make occupied spaces glow behind glazing.
- Architecture: reveal entrances, canopies, columns, and important surfaces.
- Path: guide the eye through steps and circulation.
- Landscape: add a small number of tree and planting accents.
Step 1: lock the camera and blue-hour sky
- Open Photo mode, create a 16:9 photo slot, and frame the main entrance from a human eye level. Keep verticals believable and avoid a very wide field of view that stretches the facade.
- Select Add Effect → Real Skies. Choose an Evening, Sunset, or Night sky with visible residual color near the horizon rather than a black sky.
- Rotate or flip the sky until its brightest region supports the facade instead of fighting it.
- Adjust Sky Brightness until unlit surfaces remain barely readable. Treat 40–80% as an editorial starting range, not a universal preset. The correct value depends on the chosen HDR sky and materials.
- Use Background Brightness to tune the visible sky without changing the light already falling on the model.
- If direct sunlight remains too strong, add the Sun effect and reduce Sun Brightness or move the sun below the horizon. Do not compensate by pushing every artificial light to an extreme value.
Expected result: the building silhouette, ground plane, and major trees are readable before any artificial source is added. If the image already looks like midnight, raise Sky Brightness before placing lights.
Step 2: choose the correct Lumion light object
In Build mode, open the Objects library and the Lights category. Choose a source according to the fixture’s physical job:
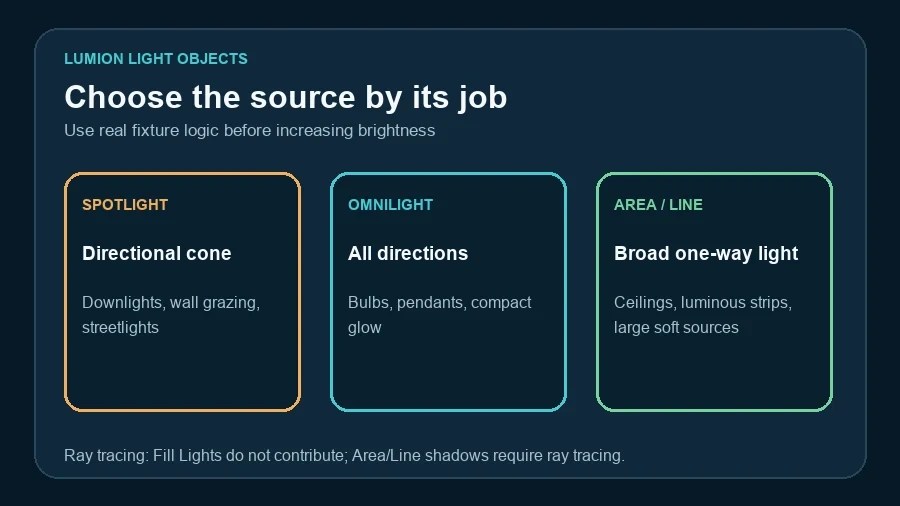
- Spotlight: a directional cone for downlights, wall grazing, streetlights, and focused facade accents. Adjust direction, Cone Angle, and an IES profile when available.
- Omnilight: an all-direction source for bulbs, pendants, compact decorative fixtures, and small pools of light.
- Area or Line Light: a broad one-way source for ceilings, luminous strips, backlit panels, and large soft sources. Width and Length determine the emitting area.
- Fill Light: a raster-only helper. It casts no shadow and does not contribute in Ray Tracing, so do not use it as the basis of a ray-traced night setup.
Lumion uses real-world-style units: Spotlights and Omnilights are controlled in lumens, while Area Lights and emissive materials use nits. The software can accept very high values, but a maximum is not a recommended setting.
Step 3: create believable interior spill
- Start with the rooms visible through the main glazing. Assign modest Emissiveness to the physical lamp or luminous surface so the fixture looks switched on.
- Add Area or Line Lights only where the modeled fixture would really produce broad light. Point each source into the room, not toward the facade glass.
- For discrete downlights, use Spotlights and align them with the modeled fixtures. Copy the source only after one representative light looks correct.
- Use warm-neutral color temperatures around 2700–3500 K for hospitality or timber interiors and 3500–4500 K for many civic or workplace spaces. These are design starting ranges; follow the actual lighting specification when one exists.
- Return to the locked photo. If the glass becomes a flat white panel, reduce the interior source or exposure. You should still see furniture, slabs, and depth behind the facade.
Step 4: light architecture and circulation separately
Make one layer for architecture and another for circulation. On the library example, narrow Spotlights graze the stone walls, recessed sources define the canopy, and low bollards clarify the route. Keeping those jobs separate prevents the facade from becoming uniformly bright.
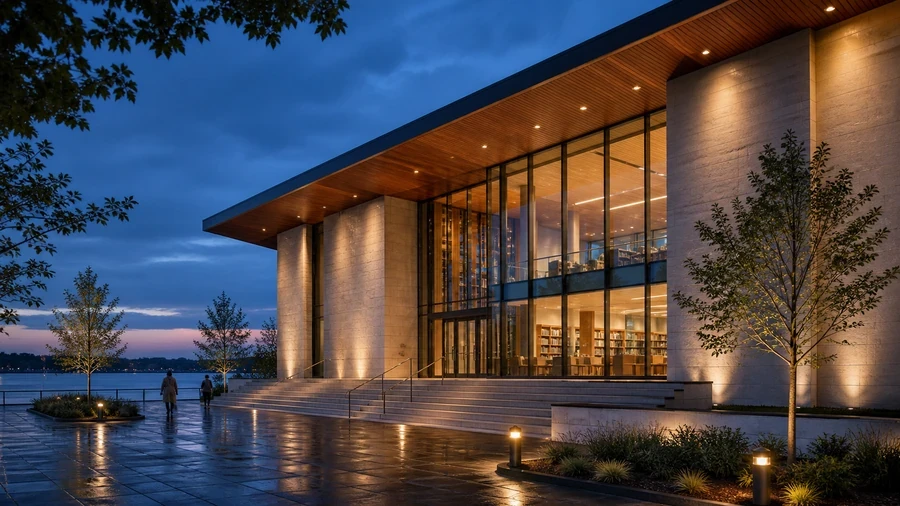
- Place one Spotlight at a real facade fixture location. Aim it with the light-target control and set Cone Angle to match the intended beam.
- Use the supplied manufacturer IES profile when possible. If none exists, choose the closest Lumion profile and record that the result is illustrative rather than a photometric calculation.
- Adjust Light Source Radius: a larger source produces softer ray-traced shadow edges; a smaller source makes them sharper. Check that the radius remains plausible for the fixture.
- Use Shadow Exclusion only when the light is trapped inside its own fixture geometry. Excessive exclusion makes light leak through surfaces.
- Duplicate the tested source along a logical fixture row. Avoid hundreds of slightly different lights when instances or a simpler hierarchy will communicate the design.
- Add low path lights at turns, stairs, and entry points. The route should read without creating a dotted runway effect.
Official video: add Area and Line Lights
Official Lumion Tutorials video: Area Lights and Line Lights. The video is embedded through WordPress’s YouTube provider; use the direct link if local privacy or network settings block playback.
Step 5: add landscape accents, then stop
Use one or two light types for important trees and planting beds, not every plant in the scene. Aim upward light away from the camera and keep the brightest vegetation below the visual importance of the entrance. Trees at the frame edge can remain in silhouette to preserve depth.
Turn off the landscape layer and compare. If the architecture becomes clearer without it, remove half the accents and test again. Night visualization benefits from deliberate darkness; unused shadow is part of the composition.
Step 6: configure Ray Tracing and exposure
- In Photo mode, choose Add Effect → Ray Tracing. Begin with a balanced quality preset for test renders.
- Render at 1920 × 1080 and inspect dark corners, soft shadows, glass reflections, and emissive surfaces at 100% zoom.
- If indirect areas look unnaturally black, increase ray-tracing quality or bounces before adding invisible fill sources. More bounces can improve light transport but increase render time.
- Add Color Correction with default values. Adjust Exposure only after sky and light-object intensity are balanced. Small changes—often within roughly ±0.3 EV—are a sensible starting test.
- Keep highlights below clipping. Use mild contrast and saturation; a night image should retain material color without turning orange-and-blue into a stylized effect.
- For animation, test the raster pipeline separately. Area/Line shadows and Fill Lights behave differently between pipelines, so one still-image setup should not be assumed to work unchanged for video.
Fix the four most common night-render problems
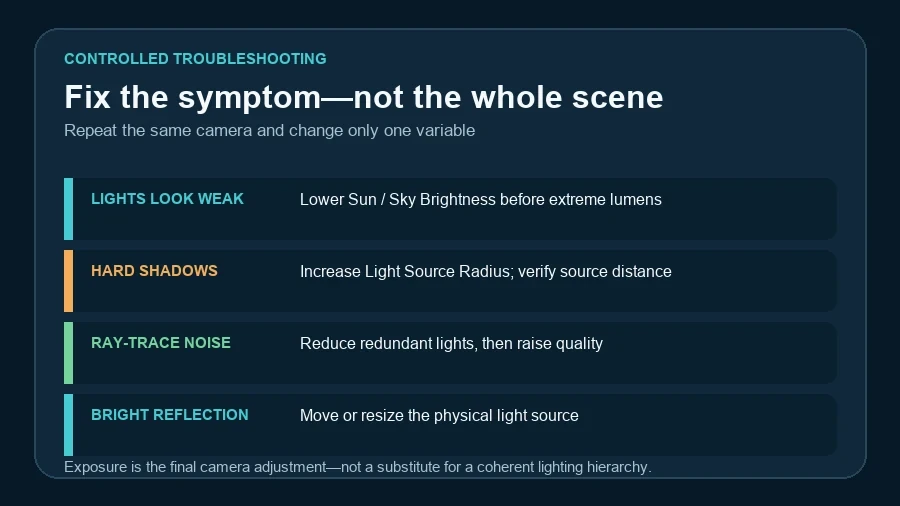
Artificial lights are invisible
Lower Sun Brightness or Sky Brightness before applying extreme lumens. Lumion’s unified lighting system makes artificial sources compete with natural light as they do in reality. A bright sky can overpower a perfectly reasonable lamp.
Shadows are too hard
Increase Light Source Radius for Spotlights or Omnilights, or enlarge the physical emitting area. In ray tracing, larger sources create softer penumbrae. Also check the distance between source and shadow-casting object.
The image is noisy
Hide redundant lights and test again. Lumion notes that more enabled lights can increase ray-traced noise because samples are distributed across more sources. Then raise the quality or samples only as far as the final output needs.
A hidden source appears in reflections
Ray-traced reflections may still show Omni, Area, or Line light sources even when their visible-source control is off. Reposition or angle the source, reduce an Omnilight’s radius, or replace an artificial helper with a correctly modeled physical fixture. There is no universal per-light “hide from reflections” switch.
Export and verify the final image
- Save a versioned project before the final render.
- Render a full-HD proof and compare it with the blue-hour base and each lighting-layer test.
- Check facade highlights, glass, tree shadows, wet-surface reflections, and dark corners at 100%.
- Increase to the required delivery resolution only after the proof passes. Very high resolution can reveal noise or memory limits that were not visible in the viewport.
- Export a clean image plus one alternate exposure if client review requires it. Do not create five nearly identical options without a decision purpose.
- The sky remains readable and does not look pasted behind the model.
- Every artificial source corresponds to a plausible fixture or stated visualization choice.
- The entrance is the brightest architectural priority.
- Interior glazing keeps depth and visible detail.
- Circulation is clear without a runway of identical lights.
- Landscape accents support rather than compete with the building.
- Ray-traced noise and reflected light sources have been checked at 100%.
- Raster animation has been tested separately if it is part of delivery.
FAQ
What color temperature should I use for a Lumion night render?
Use the real fixture specification whenever possible. As a starting point, 2700–3500 K gives a warm atmosphere, while 3500–4500 K often suits civic and workplace interiors. Avoid mixing many unrelated temperatures without a design reason.
Should I use Ray Tracing for every night scene?
Use it when realistic reflections, emissive light, and soft physically based shadows justify the render time. Rasterization remains useful for faster previews and animation, but it requires a separate lighting check because some sources and shadows behave differently.
How many lights can Lumion handle?
Lumion warns that excessive counts—particularly hundreds of enabled lights—can increase memory use, slow performance, and add ray-traced noise. There is no single ideal count for every project. Use the fewest sources that accurately represent the design and test a representative camera.
Can Lumion replace a lighting calculation package?
No. Lumion can communicate lighting intent and use real-world-style units and IES profiles, but this editorial workflow is not a compliance calculation. Verify illuminance, glare, emergency lighting, and code requirements in an appropriate specialist tool.
If you are deciding whether your workstation can handle ray-traced output, continue with our GPU memory troubleshooting guide and 2026 rendering workstation guide.
Official sources and further reading
- Lumion Learning Pathways: Lighting — light types, units, Real Skies, emissiveness, performance, and current workflow guidance.
- Lumion Support: improving artificial-light visibility.
- Lumion Support: softer ray-traced and raster shadows.
- Lumion Support: light sources in ray-traced reflections.
- Lumion 2026.1 release notes.
Continue Exploring