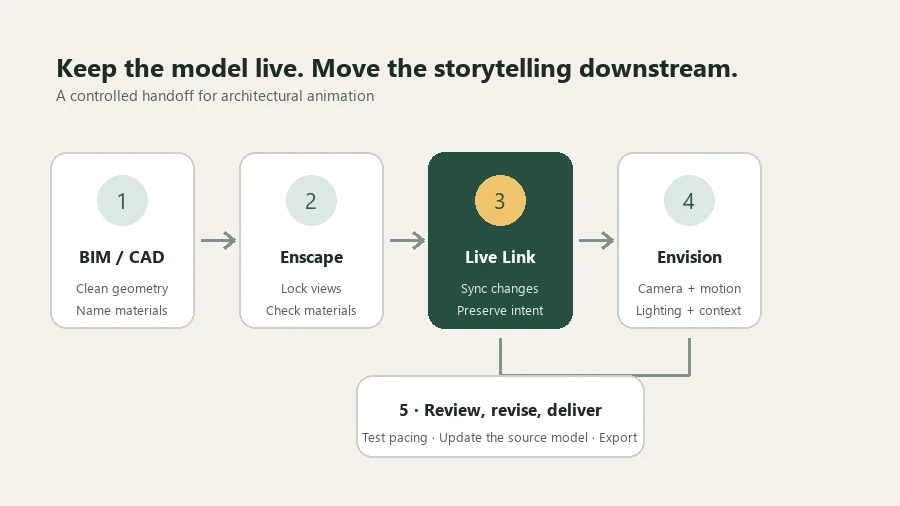
The new Enscape-to-Envision Live Link turns a design model into an animation workspace without freezing the project into a one-way export. This guide shows how to prepare a Revit, SketchUp, or Rhino scene, establish the link, build a restrained camera sequence, add movement, and verify the result before client delivery.
Why Live Link changes the handoff
A conventional export creates a snapshot. Once the visualization artist starts rebuilding materials, cameras, vegetation, and animation around that snapshot, every design revision becomes a coordination problem. Chaos introduced Enscape-to-Envision Live Link to keep the Envision scene connected to the source workflow, preserving visualization work while model changes continue upstream.
That does not mean every setting is magically identical or every model structure is equally clean. It means the team can separate responsibilities more deliberately: the architect controls geometry and design intent in Revit, SketchUp, or Rhino; Enscape remains the fast design-visualization layer; Envision carries the cinematic camera, motion, environment, and presentation work.
Before you begin: version, license, and hardware
Update Enscape before starting. Chaos announced Enscape 4.18.1 on May 27, 2026 with the Envision Live Link, a redesigned interface, improved complex-scene handling, and the removal of the earlier 2GB serialization limit. The current ArchDesign Collection includes Envision; confirm the plan and seat assigned to the workstation before a deadline.
Envision is Windows-only and requires a discrete DXR-capable GPU. Chaos lists 8GB of GPU VRAM as the minimum and recommends system RAM at least twice the VRAM capacity. For a production scene, treat that as a compatibility floor: a landscaped exterior, animated assets, high-resolution textures, and another BIM application running beside Envision can justify 12–16GB VRAM and 32–64GB RAM.
- Enscape is updated to a Live Link-capable build; this guide was verified against the 4.18.1-era release.
- Envision opens and the correct Chaos license is active.
- The workstation uses Windows 10 2004 or newer and a supported DXR GPU.
- The project has a dated backup and a separate animation working copy.
- All team members know which application owns geometry, materials, cameras, and final output.
Step 1: clean the source model before linking
Live synchronization makes revisions faster, but it also transfers inconsistency faster. Spend ten minutes cleaning the source before opening Envision.
- Remove or hide construction geometry, duplicate entourage, high-polygon objects outside the shot, and linked files that do not contribute to the animation.
- Give major materials readable names such as
EXT_Wood_CedarandEXT_Concrete_Warm. Avoid dozens of nearly identical defaults. - Group repeating elements logically. Keep facade panels, landscape zones, furniture sets, and revision-sensitive elements easy to identify.
- Check normals, texture scale, glass thickness, and visible intersections in Enscape before linking.
- Save three views:
01_Establishing,02_Approach, and03_Final. Use these as composition references, not as a promise that Envision must reproduce the exact camera path automatically.
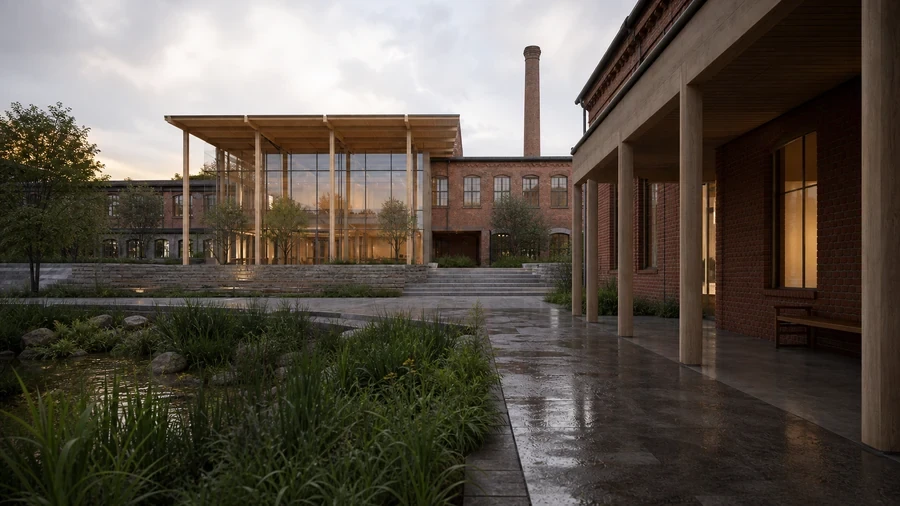
Step 2: start the Enscape-to-Envision Live Link
- Open the prepared project in Revit, SketchUp, or Rhino and start Enscape.
- Navigate to the saved establishing view and wait until assets and textures have fully loaded.
- Click the Envision Live Link command in the current Enscape interface. If the command is missing, confirm the Enscape build, Envision installation, license, and supported host application.
- Allow Envision to open and build the first synchronized scene. Do not begin editing while the initial transfer is still processing.
- Compare one close material, one transparent surface, one planted area, and the sun direction between Enscape and Envision.
- Save the Envision project with a versioned name such as
Project_Animation_v01.
The expected result is visual continuity, not pixel identity. Chaos describes the link as preserving materials, lighting, tone mapping, assets, and scene structure closely enough to avoid rebuilding the visualization. Record any mismatch before adding animation so you can distinguish a transfer issue from a later creative change.
Official video: Chaos Enscape — “Turn Your Enscape Renders into Cinematic Animations with Envision.” Open directly on YouTube.
Step 3: prove that revisions remain safe
Test synchronization before spending hours on camera work. In the source model, make one reversible change that is easy to identify—a small canopy depth adjustment or a temporary material color change.
- Save the source model and let the Live Link update.
- Confirm the intended object changes in Envision.
- Check that downstream elements—camera timing, added vegetation, and environment settings—remain intact.
- Undo the source change, synchronize again, and confirm the Envision scene returns correctly.
Step 4: build a 20–30 second camera sequence
Start with three shots rather than a long continuous tour. Architectural animation feels cinematic when every movement reveals information; it feels synthetic when the camera floats without purpose.
| Shot | Duration | Camera intent | Acceptance check |
|---|---|---|---|
| Establishing | 6–8 s | Reveal massing, approach, and landscape context. | Building reads clearly within the first two seconds. |
| Human-scale approach | 8–12 s | Show entrance sequence, material scale, and occupancy. | Camera height stays near 1.6–1.7 m without clipping. |
| Final hold | 5–7 s | Settle on the project’s strongest decision image. | Last 1.5–2 s are stable enough for titles or discussion. |
- Create the first camera and frame the building with visible foreground, midground, and background.
- Add the end keyframe only after the start frame reads well. Keep the travel distance modest.
- Use smooth interpolation/easing; avoid abrupt acceleration unless the cut requires it.
- Preview at low quality and watch only the silhouette and horizon. Fix motion before polishing materials.
- Repeat for the approach and final hold, then review the three shots in sequence.
Step 5: add context without making the scene look generated
Naturalism comes from restraint and physical logic. Use regional planting, believable density, varied but plausible scale, and people whose direction supports circulation. Chaos’s current Envision workflow can use natural-language and reference-image assistance to find Cosmos assets and propose lighting setups, but AI suggestions still require editorial control.
For vegetation, select two or three dominant species and one secondary layer rather than scattering every attractive asset. For people and vehicles, draw paths that respect doors, kerbs, turning radii, and sightlines. Offset start times so movement does not begin simultaneously. If an animated person crosses the camera, check foot contact and speed from the final viewpoint.
Temperate residential landscape, young multi-stem deciduous trees, low ornamental grasses, restrained density, no tropical species, assets suitable for a contemporary European courtyard.Step 6: establish golden-hour lighting without losing the architecture
A reference image can guide mood, but it should not override the project. Start from a physically believable sun angle: shadows long enough to describe depth, facade exposure below clipping, and a sky that supports rather than dominates the building.
- Choose a reference for light direction, contrast, and color—not for copying the building.
- Generate or select a lighting setup, then reduce the effect if whites become orange or shadows lose information.
- Check glass, vegetation, and skin tones separately; a grade that flatters timber may distort people.
- Keep a neutral version for comparison and client approval.
- Preview all shots after changing the environment because the same sun angle can help one view and damage another.
Step 7: review like a client, not like an operator
Export a low-resolution draft before the final render. Watch it at normal speed on the display where it will be presented. Do not scrub the timeline; clients cannot scrub away a confusing camera move during a meeting.
- No geometry pops, texture swaps, camera collisions, or people sliding through objects.
- Each shot communicates one architectural idea.
- Transitions feel intentional and the horizon remains stable.
- Lighting is consistent enough that cuts do not feel accidental.
- The final hold leaves room for a title, logo, or spoken conclusion.
- A source-model revision can still synchronize without destroying Envision work.
- The final codec, resolution, frame rate, audio, and delivery deadline are recorded.
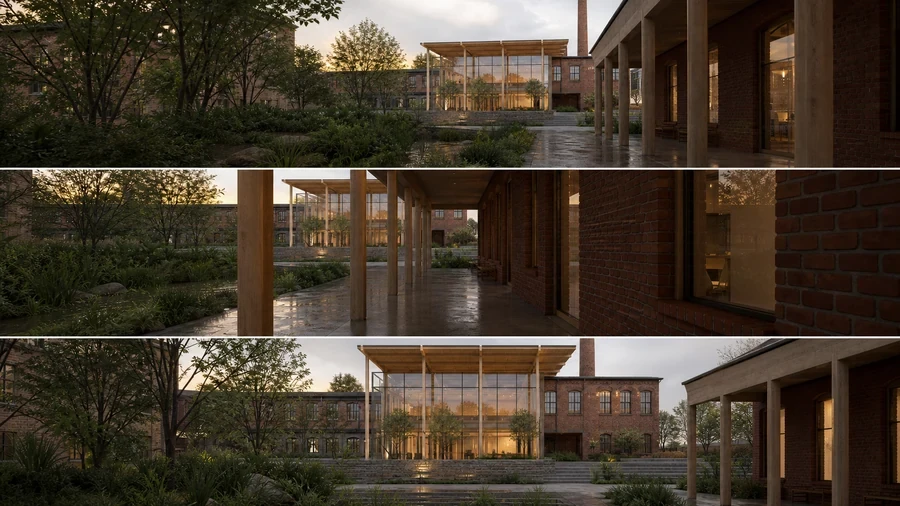
When this workflow is worth adopting
Use Live Link when design revisions are still likely but the project needs higher-end animation, richer context, or presentation work than the Enscape scene alone should carry. A solo architect making one short still may not need Envision. A visualization team producing recurring animations from changing Revit, SketchUp, or Rhino models gains more from the persistent connection.
The honest buying decision is therefore about workflow, not feature count. Test the full chain with one real project during the available trial or licensed evaluation period. Confirm host compatibility, GPU capacity, seat behavior, synchronization, and final export quality before standardizing it across a studio.
Frequently asked questions
Which Enscape version introduced the current Live Link?
Chaos highlighted Enscape-to-Envision Live Link in the Enscape 4.18.1 release announced on May 27, 2026. Always verify the current release notes before installation because maintenance builds can supersede it.
Does Live Link remove the need to organize the source model?
No. Synchronization preserves change, but poor material names, unnecessary geometry, and confusing hierarchy remain production risks.
Can Envision run on macOS?
Chaos currently lists Envision as Windows-only. Its official system requirements specify Windows 10 2004 or newer and a discrete DXR-capable GPU.
Is 8GB VRAM enough?
Eight gigabytes is the official minimum for Envision. A production exterior with dense assets and animation may need more; test a representative scene and preserve headroom.
Should AI set the final lighting and asset choices?
No. Use AI to reduce search time or generate options, then verify species, scale, placement, light direction, color, and architectural fidelity manually.
Continue Exploring