V-Ray 7 Update 3 brings ray-traced real-time rendering into the SketchUp viewport through Chaos Vantage. This guide uses one boutique-hotel lobby to show exactly how to prepare the model, start the live viewport, iterate materials and lighting, and decide when to move to a final render.
What changed in V-Ray 7 Update 3
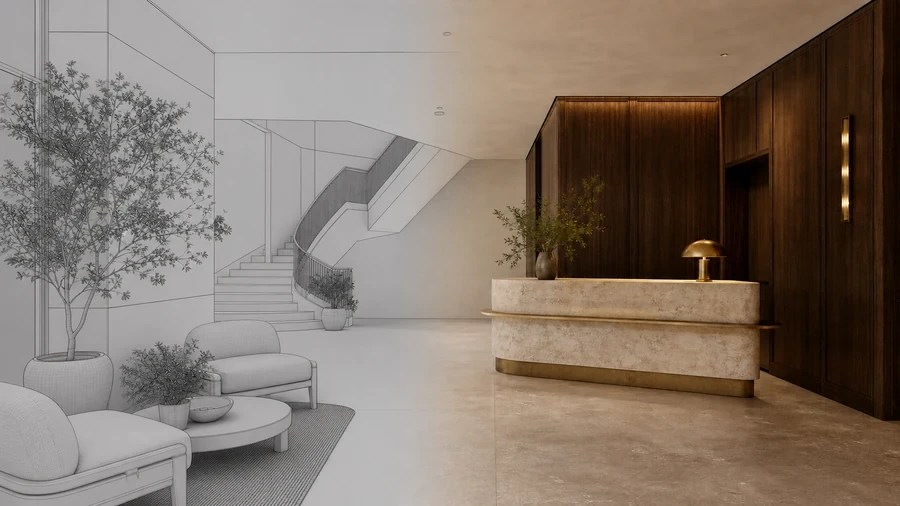
Chaos’s May 2026 tutorial identifies integrated real-time rendering as a headline V-Ray 7 Update 3 workflow. In V-Ray for SketchUp, the Vantage Viewport Render command starts a ray-traced session inside the modeling viewport. You can orbit, zoom, select, group, and draw while the rendered context remains visible. When geometry is active, a hybrid view exposes SketchUp-style edges and snapping over the rendered background.
The practical gain is not merely a faster preview. It closes the gap between a modeling decision and its visual consequence: a limestone thickness, brass roughness, sun angle, or dense Cosmos asset can be judged without exporting a new scene or repeatedly switching windows. Chaos Vantage powers this mode and requires its own compatible installation and license.
There are two boundaries to remember. First, responsive navigation is not a guarantee of zero noise or unlimited geometry on every GPU. Second, real-time feedback does not replace a controlled final render, color-managed output, or close inspection at delivery resolution.
Before you begin: software and hardware preflight
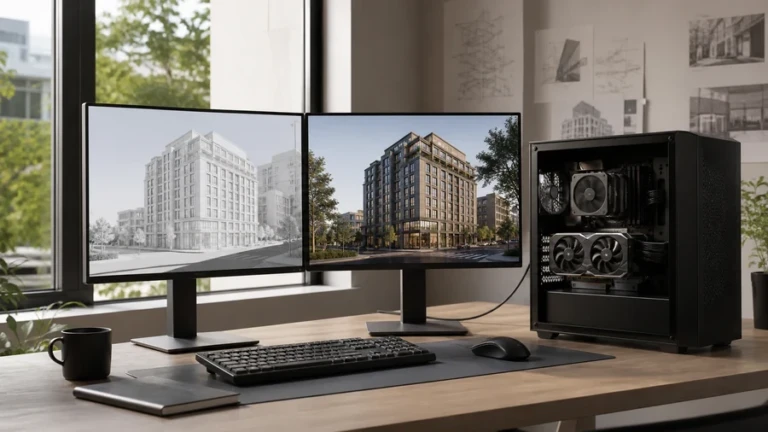
Install V-Ray 7 Update 3 for SketchUp and Chaos Vantage before opening a production file. Chaos’s Vantage requirements list Windows 10 version 2004 or newer, an AVX2-capable processor, at least 8GB system RAM, and a discrete DXR-capable GPU. The current supported families listed by Chaos include NVIDIA RTX or newer, AMD RX 6000 or newer, and Intel Arc Alchemist or newer. For NVIDIA, Chaos lists driver 535 or newer and WDDM mode.
The official minimum is a compatibility floor. For a working interior with high-resolution textures, several Cosmos assets, SketchUp, V-Ray, and Vantage open together, a practical editorial target is 32GB RAM and 12GB or more VRAM. That is a recommendation, not a Chaos requirement. If system RAM is limited, follow Chaos’s guidance that RAM should at least match GPU memory and preferably be roughly twice it.
- Duplicate the project and keep the previous V-Ray version available for deadline-critical work.
- Confirm V-Ray 7 Update 3, Chaos Vantage, and the required licenses start correctly.
- Update the GPU driver from the GPU vendor, then restart Windows.
- Verify that Vantage detects the discrete GPU; NVIDIA devices must use WDDM rather than TCC mode.
- Close unnecessary GPU-heavy applications and record free VRAM before loading the scene.
Step 1: prepare a scene that can update cleanly
Open a copy of the SketchUp project. Save it with a versioned filename such as HotelLobby_RT_v01.skp. Then clean the scene before asking the renderer to solve it continuously.
- Go to Window → Model Info → Statistics and choose Purge Unused only after confirming that unused assets are not needed for options or scenes.
- Group walls, reception joinery, furniture, lights, and planting. Fix reversed faces visible to the camera.
- Limit texture resolution to what the shot can reveal. A small metal trim rarely needs an 8K bitmap.
- Hide geometry outside the current design test: alternate furniture sets, distant floors, imported survey detail, and duplicate entourage.
- Create a SketchUp scene named
RT_01_Reception. Use a human eye height near 1.6m and avoid an excessively wide lens; roughly 28–32mm full-frame equivalent is a useful interior starting range.
Expected result: orbiting the native SketchUp view is already stable, material assignments are readable, and the chosen camera contains no obvious intersections or reversed faces.
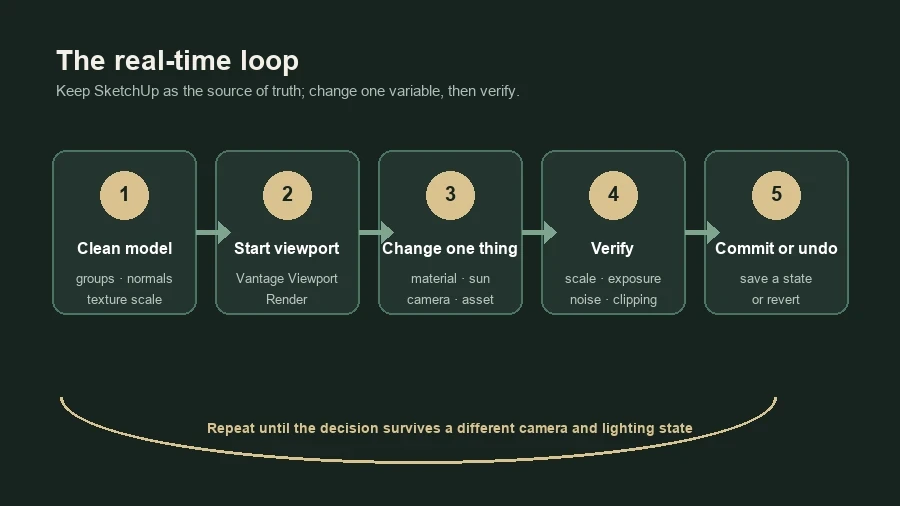
Step 2: start Vantage Viewport Render
- Open the prepared camera scene and wait until SketchUp finishes loading textures and extensions.
- On the V-Ray toolbar, click Vantage Viewport Render. Chaos documents this as the command that starts the real-time session in the viewport.
- Allow the initial scene transfer to complete. Do not judge responsiveness while the first geometry and texture upload is still running.
- Orbit a few degrees, pan, and zoom. Confirm that reflections, displacement, and shadows follow the camera.
- Select a grouped object or start a drawing operation. The viewport should enter hybrid modeling mode, exposing outlines and modeling feedback over the rendered context.
If the command is absent, confirm that you installed Update 3 rather than an earlier V-Ray 7 build. If the session opens but remains black, check Vantage licensing, GPU detection, driver version, and whether Windows is using the discrete GPU for SketchUp.
Official tutorial: Chaos V-Ray, “Real-time Rendering Is Now in V-Ray,” published April 23, 2026. Open directly on YouTube.
Step 3: tune materials with a measured target
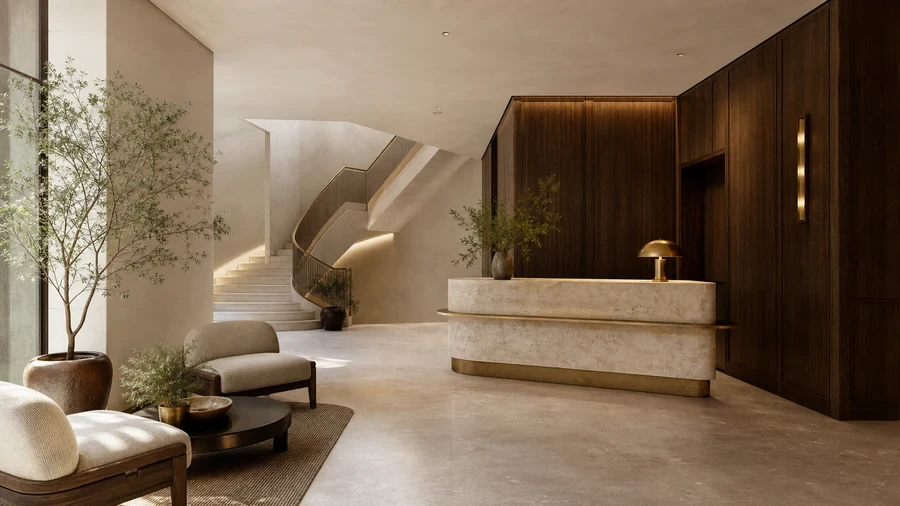
Do not begin by moving every slider. Build a small physical or digital reference board and name the material decisions. Our lobby uses six families: warm limestone, smoked oak, brushed brass, off-white linen, dark bronze, and restrained foliage. The palette gives you a target for hue, scale, gloss, and contrast.
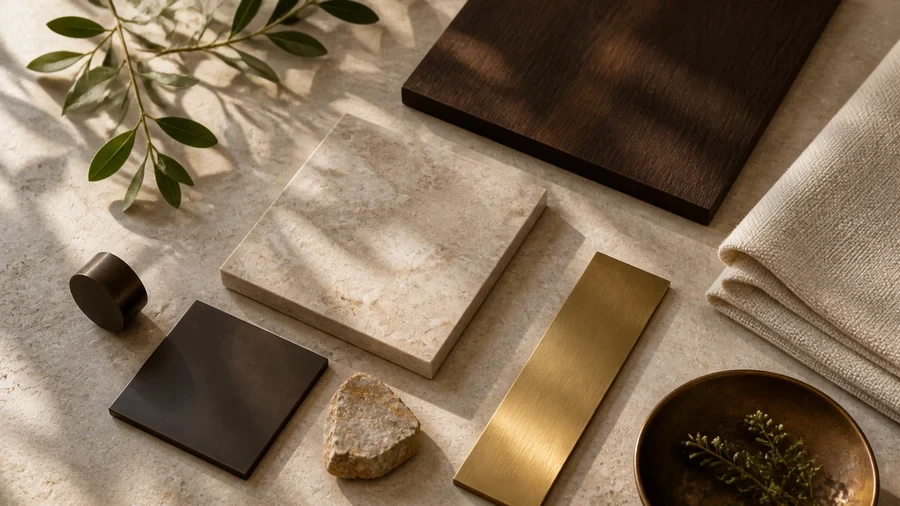
- Open V-Ray Asset Editor → Materials and select the reception limestone.
- Check texture scale first. A plausible stone pattern at the wrong scale will remain visibly wrong regardless of reflection settings.
- Set reflection and roughness from the reference, then make one small change at a time while watching a grazing camera angle.
- For brass, decide whether the specified finish is brushed, satin, or polished. Do not use mirror-like reflection for every metal.
- Use Chaos Cosmos presets as a starting point when appropriate, but rename the material and verify mapping, displacement, and file paths in the actual model.
- Deselect the object to return to the clean rendered view and inspect it from the hero camera and one close angle.
Expected result: the palette reads consistently from a distance, fabric does not look like plastic, brass retains controlled highlights, and stone remains believable at both the reception desk and floor scale.
Step 4: build three lighting states, not one lucky image
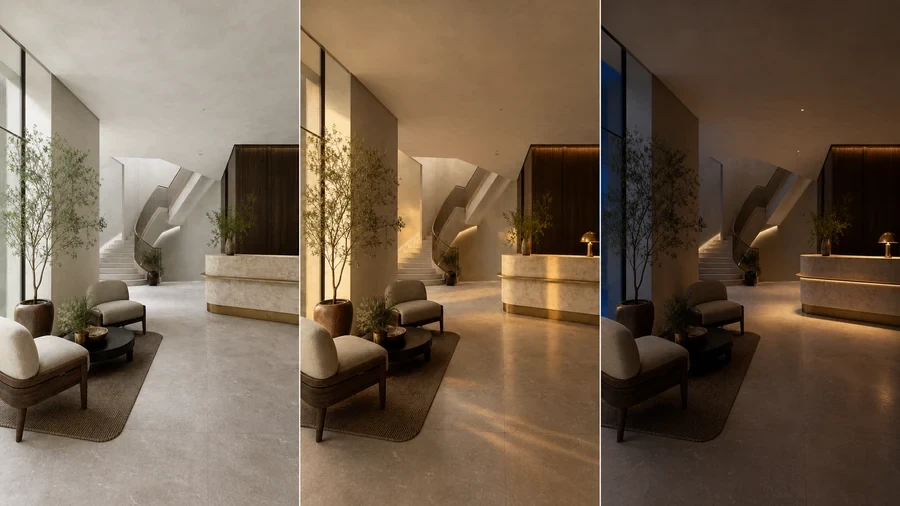
A real-time viewport becomes most useful when you compare repeatable states. Create day, dusk, and evening options without changing camera or geometry. This reveals whether the design works across operating conditions rather than only in a dramatic hero frame.
- Day: begin with soft environment light and practical fixtures off. Preserve detail outside the tall window and inside the deep reception zone.
- Dusk: lower the sun and balance warm daylight with restrained practicals. Watch for clipped bands on limestone and brass.
- Evening: reduce exterior exposure, enable reception and wall lights, and check that each fixture produces a plausible pool rather than a uniform glow.
- Add the Light Mix render element through Asset Editor → Render Elements → Add Light Mix for controlled post-render balancing. Chaos documents that Light Mix can adjust light intensity and color without rerendering.
- Save named states or presets and capture the same camera for comparison.
| State | Primary question | Failure to check |
|---|---|---|
| Day | Does daylight reach the reception and circulation path? | Window clipping, flat stone, dead corners. |
| Dusk | Do daylight and practicals balance naturally? | Orange whites, excessive bloom, double shadows. |
| Evening | Can guests navigate and read the desk? | Crushed blacks, uniform glow, noisy indirect light. |
Step 5: add assets and atmosphere without hiding the design
Chaos highlights live feedback for Cosmos assets, dense geometry, scatters, sun position, volumetric fog, depth of field, and lens effects. Use those capabilities as diagnostic tools, not decoration.
- Add one plant or furniture asset and inspect its scale, contact shadow, polygon impact, and material response before duplicating it.
- Keep scatter outside circulation zones and vary density only where the architectural concept needs it.
- If you test volumetric fog, start near zero and increase slowly. Interior hospitality images rarely need visible “god rays” to communicate the design.
- Use depth of field only after the camera composition is approved. Keep the reception face and the intended decision point sharp.
- Toggle each effect off and on. If the architecture becomes clearer when the effect is disabled, leave it disabled.
Step 6: verify, save, and move to final output
Before committing to a final render, leave the hero camera and inspect the scene from at least two diagnostic views: a low grazing angle for floor and stone mapping, and a close view of metal, fabric, glass, and light sources. Then return to the named camera and save the SketchUp file.
- The Vantage Viewport Render starts reliably after reopening the file.
- Hybrid mode appears during selection or modeling and returns to a clean render after deselection.
- No reversed faces, floating assets, texture stretching, or duplicate objects are visible.
- Material scale survives both close and wide views.
- Day, dusk, and evening states use the same camera and geometry.
- Highlights retain detail and dark areas are not crushed.
- VRAM remains below its limit with enough headroom for the intended final resolution.
- A conventional final render is checked at 100% before delivery.
Troubleshooting common failures
The live viewport is slow after adding one asset
Hide the new asset and retest. Inspect texture size, geometry density, displacement, and duplicates. Replace the asset with a lower-cost alternative before lowering quality everywhere.
The result is noisy while moving
Judge the image after the camera settles. If noise persists, simplify expensive effects, reduce unnecessary high-resolution textures, and verify that the GPU has sufficient free VRAM. Real-time navigation quality and final-frame quality serve different purposes.
Materials changed after upgrading
Compare the upgraded copy with a reference render from the previous version. Chaos notes workflow and material migration changes in V-Ray 7, and files saved in newer versions are not guaranteed to behave correctly when reopened in older V-Ray versions.
Light Mix creates noise after a large boost
Return to the scene and raise the source light’s base intensity, then rerender. Chaos warns that dramatically boosting a very dim light in Light Mix can reveal noise that was not sufficiently sampled.
Is this workflow worth adopting?
Adopt it when design decisions are still moving and you need photorealistic feedback while modeling. It is particularly useful for interiors, material approvals, facade studies, and client sessions where a change must be evaluated from several angles immediately. It is less compelling when the workstation lacks a compatible discrete GPU or when the project is already locked and only one final image remains.
The honest purchase test is a real project, not a feature reel. Use a trial or available studio license to open a representative model, measure first-load time, observe VRAM, edit one material, move the sun, add one heavy asset, and produce a final render. If that loop stays stable, the upgrade has demonstrated value for your workload.
Frequently asked questions
Is Chaos Vantage required?
Yes. Chaos states that the integrated real-time ray-traced viewport is powered by Chaos Vantage. Confirm installation, license, Windows version, and GPU compatibility first.
Does V-Ray 7 Update 3 real-time rendering work on macOS?
The Vantage-powered workflow described here depends on Chaos Vantage, whose published requirements are Windows-based. V-Ray itself has separate macOS support; do not assume that every V-Ray feature has identical platform availability.
Can I edit geometry while the render is visible?
Yes. Chaos describes a hybrid mode that appears when you select geometry, create groups, or draw, combining modeling outlines with the rendered background.
Does real-time rendering replace the V-Ray Frame Buffer?
No. Use the viewport for rapid design feedback and use the appropriate final-render and VFB workflow for delivery resolution, render elements, controlled corrections, and quality assurance.
Continue Exploring